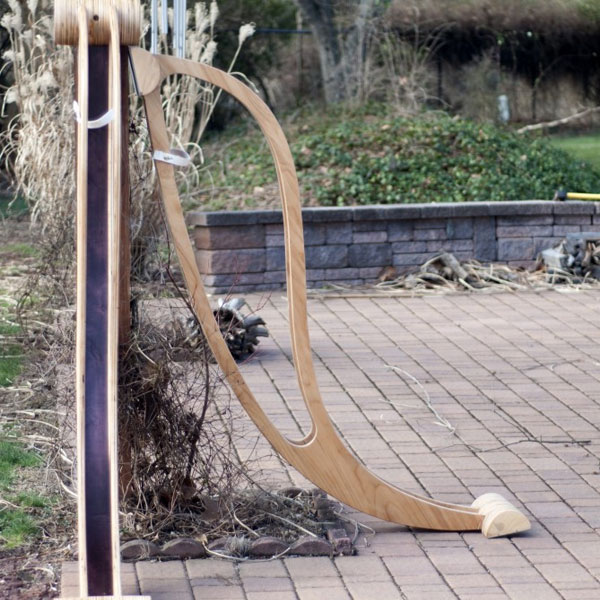
How I made Akshay & Linda’s bike racks
I will first say, I shamelessly stole this from someone else, I thought I could build it myself and it would be more meaningful.
I will also definitely say now that I would 100% buy it if I were to do it again, the cost is very reasonable considering how much work it actually required to get it to this level of finish.
Here’s the render of what I want to make:

I blew up the template, cut it up into 8.5×11 sheets, printed out the template on my regular printer, taped it all together, cut it out, stuck it to the wood and used a jig saw to cut it out, with a bit of a buffer for fine tuning later:

I didn’t take many pictures, but basically I found where the dowels will be for the attachment, and used that spot to screw the final shape to another sheet of plywood, and used a flush trim bit to trim out in two passes each additional side (3 more, for 4 sides in total)
I screwed the four together and then used the backside of all four screwed together as a curve guide to glue two pieces of luan together to make the “racetrack” in the middle and get most of the curve pre-made before assembling it.
Double checking the final assembly layout where the feet will be:

Definitely safe drilling with a big forstner bit for the dowels:

Cut out the rabbets for the “racetrack”

Used a 4×8 sheet of 1/2″ ply I had for something else and drilled holes for the dowels, that helped to get the placement exactly right while sideways, put on a half circle, glued, put on the next, so on until it was fully assembled:

Spent a lot of time fine shaping and sanding everything flat and smooth, stained the racetrack and used glue + pneumatic nail gun to install the racetracks:

Used a sanding pad and cut out the pieces for the feet, the grip it provides is EXCELLENT, on carpet, floor, anything, and it’s non-marking, which is awesome.

Used masking tape and super 77 spray adhesive to stick it on.

And the glamour shots:


Nicely done!